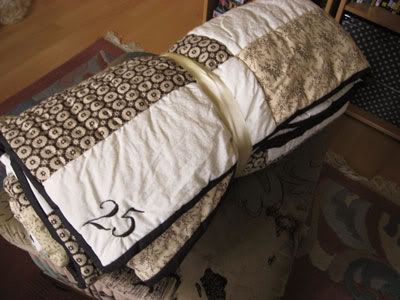
My very first quilt project was to be an anniversary quilt for my parents. I wanted it to be SO awesome, but it turned out to be harder and more time-consuming than I thought. It sure isn't perfect and I'm not really satisfied, but I think it is presentable and my parents were very happy about it - which was the intention really. So I didn't totally fail :) And I sure learned a lot.
This project was planned some time in advance and I worked on it over a long period of time with long breaks in between. So no picture tutorial, sorry. But the text will reveal some of the problems I had in the process and might be helpful for starters who don't want to make the same mistakes as I did.
Of course I first made a lot of sketches with elaborate quilting patterns until I realised that I should probably start with something simple. But even those rectangles didn't quite turn out as I had planned them.
Then I went to buy fabric. And believe me, quilting fabric and wadding for a 2x2m quilt is not quite cheap x_X But it was a special present, so I wanted to use good fabrics.
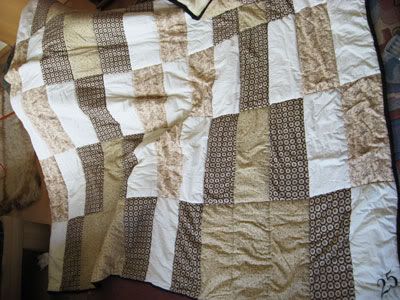
I think I screwed up the colour mix and pattern a bit, especially with that ochre-coloured fabric. Oh well...
Then I started to cut the rectangles.
Please, if you ever cut fabric for quilting.... use a template to draw the pattern onto the fabric, use a rotary cutter for cutting. I HAD a pattern, but missed out on the seam allowance, so I added that by guessing. Of course, it became irregular. And I didn't have a rotary cutter. Two mistakes I WILL NEVER MAKE AGAIN.
It could have saved me so much pain to just cut a new template, but I was too eager to start.
Damn you, enthusiasm!
Here's the crumply quilt in all its mighty glory. After I had cut out all the rectangles, I sewed them together. The borderlines don't fit exactly because of my guessing work on the seam allowance. Meh.
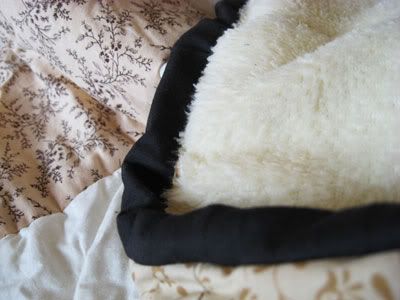
Afterwards I ordered a very large and very warm and plushie microfibre blanket from ebay for the backing of the quilt. I adjusted all three layers - the backing, the wadding, and on top the.. well, top of the quilt, the patterned fabric. I secured them with saftey pins and started to sew all of it together.
First all horizontal lines, then all vertical lines. Of course always along the lines on the fabric, which didn't always work, but most of the times.
At the end it became quite difficult to fit everything under my sewing machine. And I'm glad about that walking foot I bought two years ago.
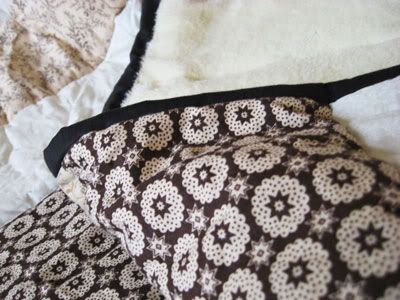
After I had sewn all the lines, only the borders were still open. That's when I discoevered I had to sew 50% of the binding by hand x_x That's about 8 meters!!!
Anyway, I found this tutorial incredibly helpful.
Since it couldn't be helped, I sewed the rest of the binding by hand. And surprisingly enough it took me only two long evenings. And was kind of satisfying... really.
And the icing on the cake is the "25" I stitched into one corner of the quilt, which took me another two evenings. Without an embroidery frame. Again, something I won't do again.
Although the fabric is a little crumply around the edges, I still think the 25 turned out beautifully, I really like it.
Actually, I like the whole damn thing because its cozy and incredibly warm and it doesn't fall apart :'D
I sure will do more quilting projects now that I know which mistakes to avoid, but not until I bought a rotary cutter and a cutting mat. Seriously.
skip to main |
skip to sidebar
everyday creative projects for your nifty home
"All art is quite useless"
- Oscar Wilde
Copyright 2009
some nifty things .
Powered by
Blogger.
Blogger Templates created by Deluxe Templates
WP Themes designed by EZwpthemes .
Blogger Templates created by Deluxe Templates
WP Themes designed by EZwpthemes .


5 comments:
Kudos for managing embroidery without a frame - I even have my trouble when using one /D
I really the colour scheme, even with the ochre coloured fabric and I see why your parents were so happy about it :3
wowza *_*
the hand sewing part looks like it has been a real pain in the ass!
2 questions:
when conjoining the "quilted" part (the layer where you actually have all the rectangles) and the blanket did you sew over the seams that conjoin the rectangles?
I mean, when you look onto the quilt: do you see the seams (on both layers upside/downside?) *_*
and the stitching, did you do that AFTER conjoinig the layers? (if yes: wouldn't it have been easier before? ^^; )
congrats to the great work ^_-
It was XD Although paradoxically, it also was fun...
First question: Yes, I sewed over the seams that were created by joining the rectangles. You don't actually see the seams on the back side of the quilt because the blanket is sooo plushie, it covers up the seams, but you still have that quilt-effect, that is you see the rectangle pattern on the back.
Second question: Absolutely! :'D But at first I had planned to embroider the 25 on the binding, but then I decided on a small binding so that the 25 would not have fit onto it. That's why I stitched it afterwards.
Thank you!! <3
Hey! Congrats to your first quilt! And although it is absolut stress it is also addicting nai? But although I made a lot of quilts for other people (baby quilts, my brother got a formentera one...) I alsways finished them just in the very last minute after staying awake for at least two nights... and I didn't manage at all to make just ONE for myself... ^^
By the way: The number turned out really beautiful! I am tempted to give all my stichings to you :)
Thanks <3 And yes, it is totally addicting! I seriously contemplated making a smaller quilt with my sewing machine and afterwards stitching a pattern on it by hand because that was so much fun, too. And you can watch films or play pen & paper games while stitching :'D Awesome!
Hehe, once I have bought my stitching frame and you'd like something to be stitched, just tell me ;D
I feel a little a little bad because I haven't started your axolotl yet, but the good news is: I'll start next week! :D
Post a Comment