Hi people!
I came to spam your dashboards - again. Weeeh!
Since I have a big kitchen in my new flat and one of my new
flatmates is vegetarian, I got some drive to try and cook veggie
dishes - again, the idea stroke me from having leftovers.
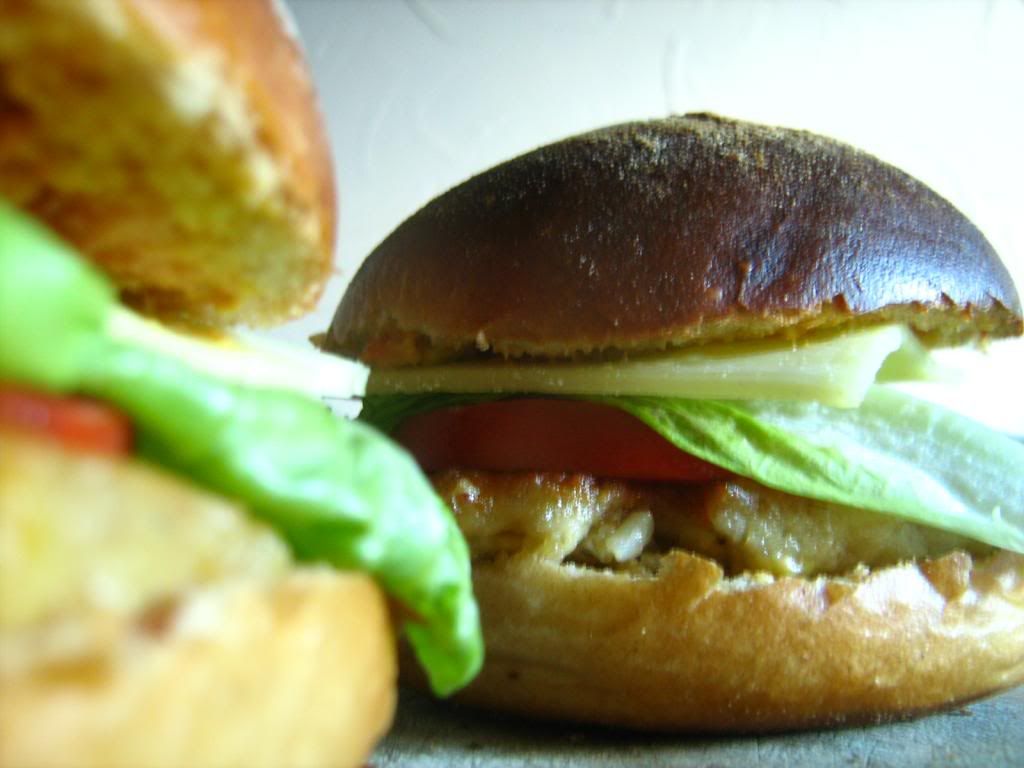
What you need for 6 burgers:
6 burger buns with sesame, or whole-grain buns
12 slices of cucumber (pickled ones if you like)
9 slices of tomato
6 salad leaves (I used small lettuce hearts, and therefore 12
leaves)
Mayonnaise, ketchup, mustard or whatever burger sauce you like
6 slices of cheese
For the "patties":
100 g oatmeal
200 g chickpeas (that's my leftover ingredient)
1 onion (bigger size)
2-3 cloves of garlic
1 egg
250-300 ml vegetable stock (instant is fine)
spices (salt, pepper, chili, ... I used a premixed bunch of
salad-spices)
Prepare the patties:
Mash the chickpeas (I used the ones that come in salty water
already. If you want to use dry ones, you have to let them soak
themselves with water over night and cook them).
Cut onion and garlic and sweat it with butter in a pan until the
onion becomes lucent, then add the oatmeal. Stir it for ~5 min, so it
gets a bit crispy, then add the mashed chickpeas and the vegetable
stock. Let it sit on the oven over low heat for about 15 min until
the stock dissolves. If it doesn't get sticky and dough-like after
that time you may have to add some flour.
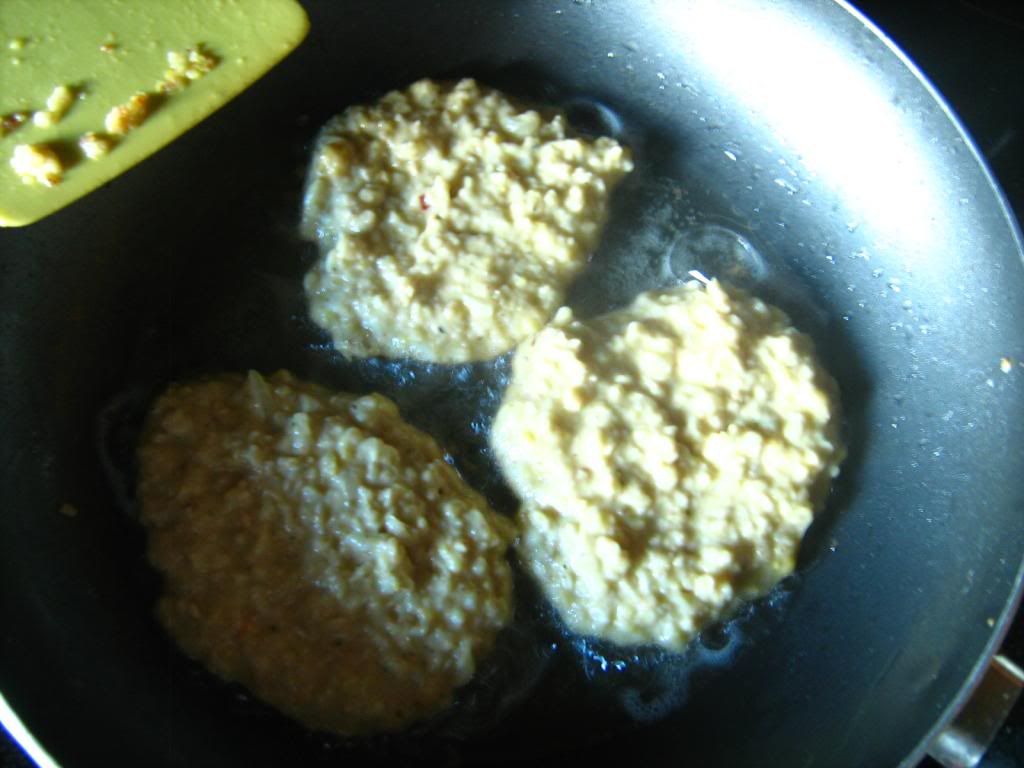
Take it from the oven and let it cool down for a while (put it
outside the window if it's cold or destroy the environment a bit more
while putting it into the freezer ;P).
Add the egg, mix the mass well, then form patties out of it or be
lazy and just fill it into a hot pan filled with some oil (sunflower
seeds or whatever you like, but rather no olive oil) via a laddle.
Fry them from both sides until they get golden-brownish.
While frying the patties you can prepare your buns:
Cut them open, put your preferred sauce on both sides (I used a
mix of ketchup, mustard and mayo). Prepare the cheese, cut the
tomatoes, cucumber and pick the salad leaves.
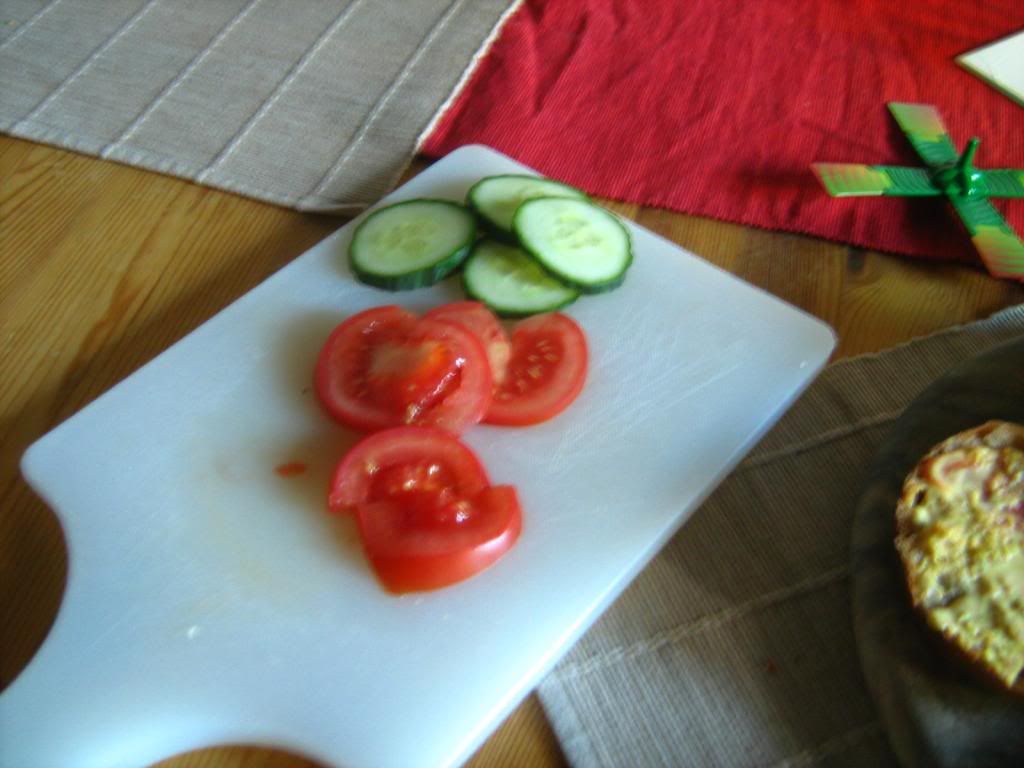
When the patties are done, arrange your burgers and then:
Yummieyum! Eat them all... ehm with friends, of course!
Cheers,
~Qan
Follow me
November 12, 2012
November 06, 2012
Orangeflavoured pumpkin soup with champignons
Hello there!
It's truly been a while, a very long one, but here I am, back again, with a new recipe perfectly for autumn days crying for a hot soup.

I made a pumpkin cake for Halloween and had some leftover pumpkin, and oranges and champignons... Yeah and that's the whole story.
What you need for 2-3 servings:
200-300 g pumpkin (I used Hokkaido, cause it's the easiest, since you don't have to peel it)
300 g champigons
the juice and some grated peel of 1/2 orange
100-200 ml milk
spices: salt, pepper, ginger, garlic, nutmeg, chili (put as much in as you like) grated cheese
optional: 1 potato, 1 small carrot
Cut the pumpkin (optional potato + carrot) and boil it with some salted water until softened. While your pumpkin is boiling, cut the champignons and fry them with a little oil and spices (salt, pepper, garlic).
Set them aside.
Add the orange peel to the pumpkin, then use a hand-held blender to mash everything.
Add some milk to make the soup more creamy and heat it until it boils again.
Put the champignons in and then add spices and the orange juice until the soup meets your taste.
Serve it with some grated cheese on top.
I hope you like it. For me it was the perfect meal after halloween.
See you guys and take care. ^^
~Qan Follow me
I made a pumpkin cake for Halloween and had some leftover pumpkin, and oranges and champignons... Yeah and that's the whole story.
What you need for 2-3 servings:
200-300 g pumpkin (I used Hokkaido, cause it's the easiest, since you don't have to peel it)
300 g champigons
the juice and some grated peel of 1/2 orange
100-200 ml milk
spices: salt, pepper, ginger, garlic, nutmeg, chili (put as much in as you like) grated cheese
optional: 1 potato, 1 small carrot
Cut the pumpkin (optional potato + carrot) and boil it with some salted water until softened. While your pumpkin is boiling, cut the champignons and fry them with a little oil and spices (salt, pepper, garlic).
Set them aside.
Add the orange peel to the pumpkin, then use a hand-held blender to mash everything.
Add some milk to make the soup more creamy and heat it until it boils again.
Put the champignons in and then add spices and the orange juice until the soup meets your taste.
Serve it with some grated cheese on top.
I hope you like it. For me it was the perfect meal after halloween.
See you guys and take care. ^^
~Qan Follow me
Labels:
autumn,
dishes,
vegetarian
August 05, 2012
Embroidered bookmark
A very nice and quick-to-do present if you give away e.g. a book and you want to make it more personal. I had the idea at my sewing lesson I give every monday to some childeren in a free after-school care club. We stitched birthday cards with yarn on colurful paper. This is also a nice idea also for grown-ups (or pretending to be grown-ups ^^) but I made a bookmark in the evening instead.
You just need about 10 x 15 cm of a nice paper, I used a page from an old book. Fold it in the middle so that in becomes a long rectangle and unfold it. Now you can design anything you want on the right side of the rectangle. I chose a feather in purple. Draw it with thin lines so you don't see it too much later. Then begin stitching. When you are finished, just glue the sides together like a book. Now you can also change the form of the bookmark (e.g. cutting the upper edges) or insert a hole to adjust a ribbon, maybe in the same colour as your yarn. Now you have a beautiful embroidered bookmark! Follow me
Asymmetrical skirt ..or as I call it: The Mullet
The asymmetrical skirt is very easy to sew and the "it piece" of the season. I really like this kind of cut as it puts together the advantages of a long skirt in the back and a short one at the front. ^^ And the German word for it, Vokuhila, is so cool. XD
Click for pattern scheme :)
So as you see, you only need a piece of fabric that is a bit wider than your hip, I think mine was about 1,40m wide. The shortest length on the sides can be about 40 cm, the longest you can vary, depending on your leg length, my skirt is about 90 cm long. The fabric I used is a very old one from my grandma, even from GDR-times. When you have cut it, just sew the short sides together, they will be in the front later when wearing it. Then sew a tunnel in the upper part and place a rubber band in it, its length depends on your hip/waist size. Fix it. So that's it. If you wanto to, sew at least the hemline properly. That's it ^^ Follow me
Click for pattern scheme :)
So as you see, you only need a piece of fabric that is a bit wider than your hip, I think mine was about 1,40m wide. The shortest length on the sides can be about 40 cm, the longest you can vary, depending on your leg length, my skirt is about 90 cm long. The fabric I used is a very old one from my grandma, even from GDR-times. When you have cut it, just sew the short sides together, they will be in the front later when wearing it. Then sew a tunnel in the upper part and place a rubber band in it, its length depends on your hip/waist size. Fix it. So that's it. If you wanto to, sew at least the hemline properly. That's it ^^ Follow me
August 04, 2012
Butterfly stationery
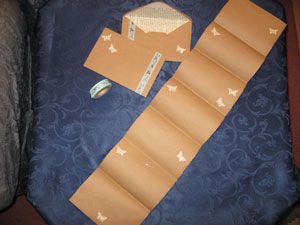
Yet another set of writing paper and envelopes
I got beautiful crafting tape for my birthday a while ago and the first thing I did with it was this :D
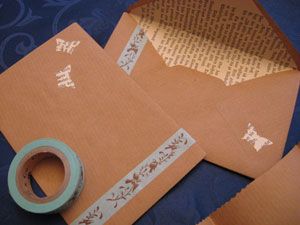
I made the writing paper and the envelopes from normal wrapping paper. The great thing about wrapping paper is that it comes in rolls, so my writing paper pages are really long. Which is great because I tend to write long letters and it always bugged me that stationeries only contain one (!) page of paper for each enevlope. Who could make do with that?!
I coated the insides on the enevlopes with the pages that were leftover from my book box project and also used them for the butterflies on the enevelopes and writing paper.
Finally some nice paper tape and done!
Really fast and easy project :D
Follow me
I got beautiful crafting tape for my birthday a while ago and the first thing I did with it was this :D
I made the writing paper and the envelopes from normal wrapping paper. The great thing about wrapping paper is that it comes in rolls, so my writing paper pages are really long. Which is great because I tend to write long letters and it always bugged me that stationeries only contain one (!) page of paper for each enevlope. Who could make do with that?!
I coated the insides on the enevlopes with the pages that were leftover from my book box project and also used them for the butterflies on the enevelopes and writing paper.
Finally some nice paper tape and done!
Really fast and easy project :D
Follow me
Parasol
I made a parasol from a normal umbrella as a commissioned work for my only customer ever :'DDD (I make a lot of stuff for other people, but they are usually presents from me to them).
It's a really easy project, especially since you can do it the pro way or the noob way. I did it the noob way because I'm lazy and the result is just fine!
There are quite some nice step by step tutorials for this project you can find on the internet.
First you have to take the top off the umbrella and cut the threads that hold the fabric to the skeleton. Take off the fabric.
The pro way is to undo some threats of the cover so that you have one of the eight parts that make up the fabric cover of the umbrella. You can use this as a pattern to create eight other parts with your own fabric and sew them together to create a new cover.
I did it the noob way and just put the open skeleton on the fabric I wanted to use and cut around. I'm pretty good at cutting, so no problem there. Plus I saved myself a lot of time and bothersome seams.
I did that twice because I used some nice lace fabric on top of a semi-translucent fabric.
Pinned both fabrics together afterwards and sowed them together. Added two kinds of lace for embellishment. Tadaaa!
Oh wait - the last part is extremely boring and annoying. You have to re-attach the cover to the skeleton by sewing it to the eight arms. I did that three times for every arm, so 24 times. But then I was done, thank god!
You have to be careful, though! The two layers of fabric are much heavier than the original fabric, so be gentle when opening and closing the parasol, don't give it hard waves and better not use it in heavy wind.
The parasol can be tied together with a satin ribbon.
Follow me
It's a really easy project, especially since you can do it the pro way or the noob way. I did it the noob way because I'm lazy and the result is just fine!
There are quite some nice step by step tutorials for this project you can find on the internet.
First you have to take the top off the umbrella and cut the threads that hold the fabric to the skeleton. Take off the fabric.
The pro way is to undo some threats of the cover so that you have one of the eight parts that make up the fabric cover of the umbrella. You can use this as a pattern to create eight other parts with your own fabric and sew them together to create a new cover.
I did it the noob way and just put the open skeleton on the fabric I wanted to use and cut around. I'm pretty good at cutting, so no problem there. Plus I saved myself a lot of time and bothersome seams.
I did that twice because I used some nice lace fabric on top of a semi-translucent fabric.
Pinned both fabrics together afterwards and sowed them together. Added two kinds of lace for embellishment. Tadaaa!
Oh wait - the last part is extremely boring and annoying. You have to re-attach the cover to the skeleton by sewing it to the eight arms. I did that three times for every arm, so 24 times. But then I was done, thank god!
You have to be careful, though! The two layers of fabric are much heavier than the original fabric, so be gentle when opening and closing the parasol, don't give it hard waves and better not use it in heavy wind.
The parasol can be tied together with a satin ribbon.
Follow me
Axolotl fishbowl
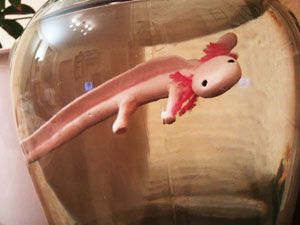
This is my axolotl fishbowl!
Actually, it is not mine anymore. It started out as a symbolic present for a character in a live role playing game and kept getting more elaborate in the process. In the end the effort was totally over the top, but I just had so much fun working on it :D
I had this reeeeally big jar from a job at a delikatessen shop and wanted to do something with it so bad.
So I made an axolotl out of fimo and baked it in the oven. The eyes are little pearls. Then I added several layers of water proof lacquer and attached some fuzzy wool on the head as gill rakers.
Then I added some decorative stones to the bottom of the jar and filled it with tap water.
Finally I just tied some transparent thread to the axolotl and attached it to the inside of the lid with adhesive tape.
Easy as pie!
You could add fake aquatic plants or other aquarium decoration to make the whole thing look even nicer. But it's really fast and chep project and it looks great :D And so cute! Follow me
Actually, it is not mine anymore. It started out as a symbolic present for a character in a live role playing game and kept getting more elaborate in the process. In the end the effort was totally over the top, but I just had so much fun working on it :D
I had this reeeeally big jar from a job at a delikatessen shop and wanted to do something with it so bad.
So I made an axolotl out of fimo and baked it in the oven. The eyes are little pearls. Then I added several layers of water proof lacquer and attached some fuzzy wool on the head as gill rakers.
Then I added some decorative stones to the bottom of the jar and filled it with tap water.
Finally I just tied some transparent thread to the axolotl and attached it to the inside of the lid with adhesive tape.
Easy as pie!
You could add fake aquatic plants or other aquarium decoration to make the whole thing look even nicer. But it's really fast and chep project and it looks great :D And so cute! Follow me
February 21, 2012
I-It's A Post, Y'All!
Dears,
time to breathe some life back into this blog. My number one resolution for 2012 is to sew, sew, sew since last year was so very unproductive. Thus, I finally sat down to finish my first proper corset.
I started making this baby last summer but when it came to hammering in the eyelets it suddenly started to collect dust on my drawer... Yesterday I finally sat down to finish the poor baby and decided to stitch on a few beads on top of the lace appliques. Not entirely sure about the chain, I might just snip it off again. What do you guys think?
I made the pattern according to these instructions on Natron und Soda and it fits me quite nicely (even though I've lost a bit of weight since starting it - but I'm not one for extreme waist reduction anyways). Overall it's nice and heavy. The outer fabric and lining are made of some mysterious shiney cotton fabric with a very sturdy weave, the interlining is two layers of thick canvas. The deco consists of several lace appliques sewn onto each other and, of course, lots and lots of lace.
And finally... the back:
Byebye folks, hope you enjoyed this post! Follow me
time to breathe some life back into this blog. My number one resolution for 2012 is to sew, sew, sew since last year was so very unproductive. Thus, I finally sat down to finish my first proper corset.
I started making this baby last summer but when it came to hammering in the eyelets it suddenly started to collect dust on my drawer... Yesterday I finally sat down to finish the poor baby and decided to stitch on a few beads on top of the lace appliques. Not entirely sure about the chain, I might just snip it off again. What do you guys think?
| with the chain stuffed in |
And finally... the back:
| excuse |
The eyelets are not quite even which bugs me a bit. Guess I'll have to do better next time. Talking of that... for the next I'll make (someday) I'd try adding seam allowances to the pattern. This might allow for the pieces to be sewn together more easily. We'll see. All in all it was a beneficial experience :3
Byebye folks, hope you enjoyed this post! Follow me
October 30, 2011
Autumn Candle Glass
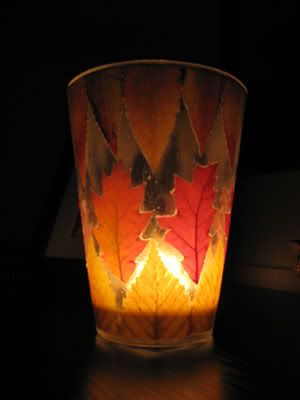
Want to catch some cozy autumn feeling in a glass?
I have found this great idea on some crafting blog. Sadly I lost the link when my old laptop crashed and I couldn't find it again.
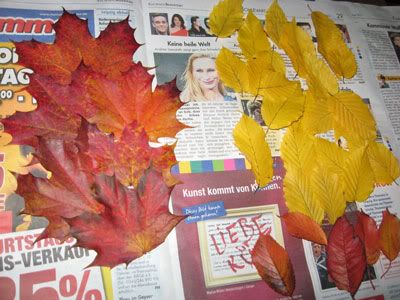
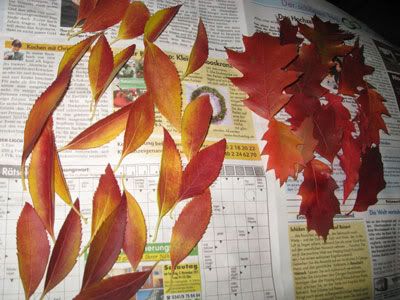
So today I took a walk through the beautiful autumn forests and collected some coloured leaves.
I really love those on the left because they are bi-coloured. Also, I noticed that you get the most beauitfully coloured leaves from very young trees.
Well then I took them home, washed and dried them, and started crafting.
I thought I could simply attach them to the glass with mod podge, but the surfaces really didn't work well together. Too smooth.
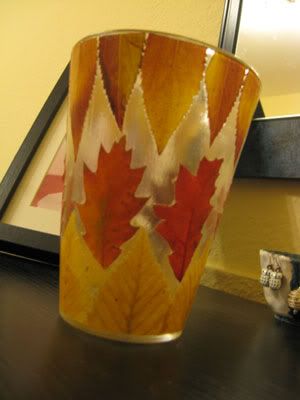
So first I applied a whole layer of mod podge to the glass and the leaves I wanted to use and let them dry. Then I applied another thin layer on the leaves and attached them to the glass, holding a hairdryer in my mouth, directed at the leaf, while I pressed it onto the glass with both hands. Must have looked hilarious.
It really was a rather tricky procedure. But I love the result.
I applied like two thick layers of the mod podge on top and probably will apply another one tomorrow. I just want to make sure everything it absolutely airtight and I hope this will prevent the colours from fading and the leaves from drying.
The glass on a mirror.
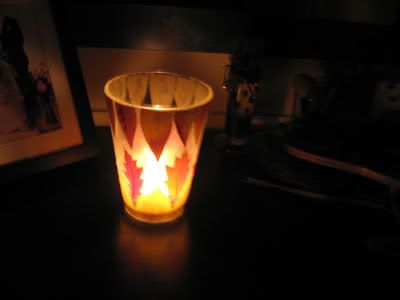
I think the yellow and red also make for a nice Christmas decoration.
Follow me
I have found this great idea on some crafting blog. Sadly I lost the link when my old laptop crashed and I couldn't find it again.
So today I took a walk through the beautiful autumn forests and collected some coloured leaves.
I really love those on the left because they are bi-coloured. Also, I noticed that you get the most beauitfully coloured leaves from very young trees.
Well then I took them home, washed and dried them, and started crafting.
I thought I could simply attach them to the glass with mod podge, but the surfaces really didn't work well together. Too smooth.
So first I applied a whole layer of mod podge to the glass and the leaves I wanted to use and let them dry. Then I applied another thin layer on the leaves and attached them to the glass, holding a hairdryer in my mouth, directed at the leaf, while I pressed it onto the glass with both hands. Must have looked hilarious.
It really was a rather tricky procedure. But I love the result.
I applied like two thick layers of the mod podge on top and probably will apply another one tomorrow. I just want to make sure everything it absolutely airtight and I hope this will prevent the colours from fading and the leaves from drying.
The glass on a mirror.
I think the yellow and red also make for a nice Christmas decoration.
Follow me
Donkey Piñata Time!
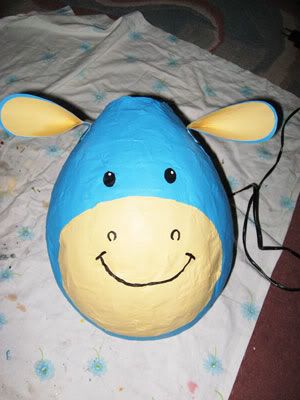
I made a piñata! Yay!
I wanted to make one for some time now and last week I spontaneously decided to try it for a birthday. Since I had no experience whatsoever I decided on a rather simple design without any fancy extras such as limbs.
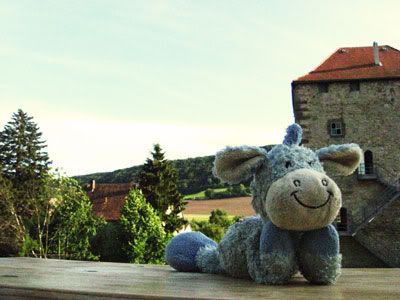
The inspiration was my favourite star model: Eselchen
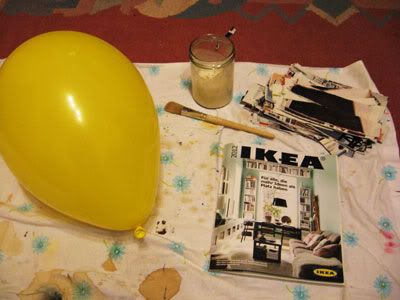
All I used was a balloon, an IKEA catalogue (I didn't have regular newspaper D:), and acrylic colours.
For the glue I tried a simple recipe I found on the internet. One part flour, two parts water. Didn't work too well, so I added decoupage glue-lacquer to it and it worked just great.
I really wouldn't recommend shiny catalogue paper. Real newspaper is the best because it soaks through really fast and is very hard when the glue-mix is dried, but I had to make do with what I had at home.
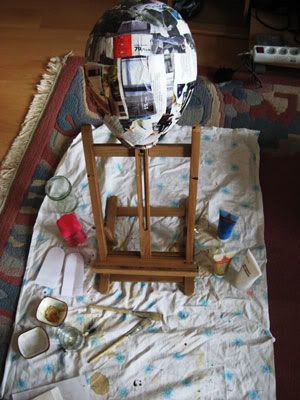
I made about 5 - 7 layers, I think, and it had some stability in the end, but not as much as it would have had with newspaper. When everything is dry you can make the balloon pop.
But seriously, make sure it's dry, otherwise the air that is forced out by the explosion might blast a hole or two into the damn thing :D.
I used some paper to form the ears, painted them, and attached them to the painted "head" afterwards.
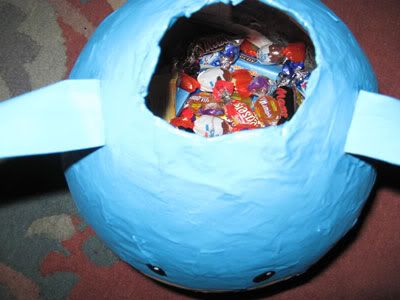
After the colour had dried I filled it with sweets
When I bought all that stuff the cashier asked me if I were preparing for Halloween... what a funny woman! I don't share my chocolate with strangers :p
I couldn't figure out an intelligent way to create a construction to hang it up on. But then again it's too cute to beat it with a stick anyway.
I have a tendency to make things that are too cute to throw away but too useless to keep. But in any case, you can use it as a vault for sweeeets and chocolate :D
"Am I not cute?"
Follow me
I wanted to make one for some time now and last week I spontaneously decided to try it for a birthday. Since I had no experience whatsoever I decided on a rather simple design without any fancy extras such as limbs.
The inspiration was my favourite star model: Eselchen
All I used was a balloon, an IKEA catalogue (I didn't have regular newspaper D:), and acrylic colours.
For the glue I tried a simple recipe I found on the internet. One part flour, two parts water. Didn't work too well, so I added decoupage glue-lacquer to it and it worked just great.
I really wouldn't recommend shiny catalogue paper. Real newspaper is the best because it soaks through really fast and is very hard when the glue-mix is dried, but I had to make do with what I had at home.
I made about 5 - 7 layers, I think, and it had some stability in the end, but not as much as it would have had with newspaper. When everything is dry you can make the balloon pop.
But seriously, make sure it's dry, otherwise the air that is forced out by the explosion might blast a hole or two into the damn thing :D.
I used some paper to form the ears, painted them, and attached them to the painted "head" afterwards.
After the colour had dried I filled it with sweets
When I bought all that stuff the cashier asked me if I were preparing for Halloween... what a funny woman! I don't share my chocolate with strangers :p
I couldn't figure out an intelligent way to create a construction to hang it up on. But then again it's too cute to beat it with a stick anyway.
I have a tendency to make things that are too cute to throw away but too useless to keep. But in any case, you can use it as a vault for sweeeets and chocolate :D
"Am I not cute?"
Follow me
October 26, 2011
Anniversary Quilt
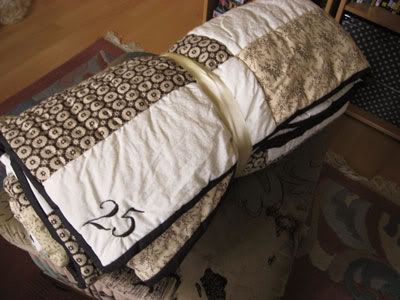
My very first quilt project was to be an anniversary quilt for my parents. I wanted it to be SO awesome, but it turned out to be harder and more time-consuming than I thought. It sure isn't perfect and I'm not really satisfied, but I think it is presentable and my parents were very happy about it - which was the intention really. So I didn't totally fail :) And I sure learned a lot.
This project was planned some time in advance and I worked on it over a long period of time with long breaks in between. So no picture tutorial, sorry. But the text will reveal some of the problems I had in the process and might be helpful for starters who don't want to make the same mistakes as I did.
Of course I first made a lot of sketches with elaborate quilting patterns until I realised that I should probably start with something simple. But even those rectangles didn't quite turn out as I had planned them.
Then I went to buy fabric. And believe me, quilting fabric and wadding for a 2x2m quilt is not quite cheap x_X But it was a special present, so I wanted to use good fabrics.
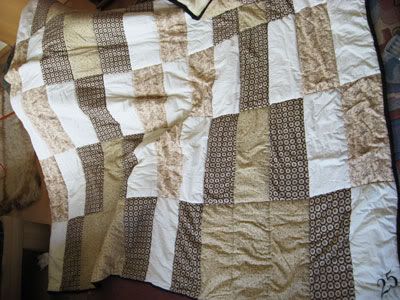
I think I screwed up the colour mix and pattern a bit, especially with that ochre-coloured fabric. Oh well...
Then I started to cut the rectangles.
Please, if you ever cut fabric for quilting.... use a template to draw the pattern onto the fabric, use a rotary cutter for cutting. I HAD a pattern, but missed out on the seam allowance, so I added that by guessing. Of course, it became irregular. And I didn't have a rotary cutter. Two mistakes I WILL NEVER MAKE AGAIN.
It could have saved me so much pain to just cut a new template, but I was too eager to start.
Damn you, enthusiasm!
Here's the crumply quilt in all its mighty glory. After I had cut out all the rectangles, I sewed them together. The borderlines don't fit exactly because of my guessing work on the seam allowance. Meh.
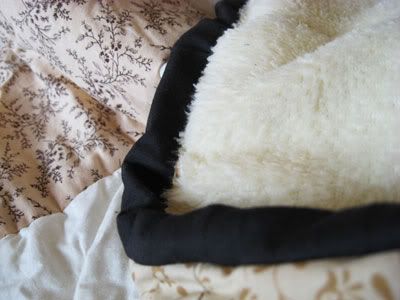
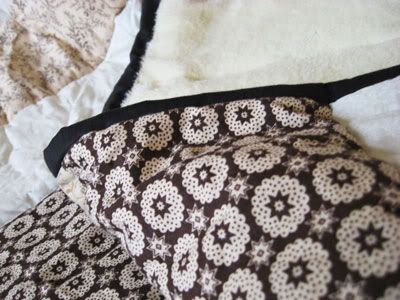
Afterwards I ordered a very large and very warm and plushie microfibre blanket from ebay for the backing of the quilt. I adjusted all three layers - the backing, the wadding, and on top the.. well, top of the quilt, the patterned fabric. I secured them with saftey pins and started to sew all of it together.
First all horizontal lines, then all vertical lines. Of course always along the lines on the fabric, which didn't always work, but most of the times.
At the end it became quite difficult to fit everything under my sewing machine. And I'm glad about that walking foot I bought two years ago.
After I had sewn all the lines, only the borders were still open. That's when I discoevered I had to sew 50% of the binding by hand x_x That's about 8 meters!!!
Anyway, I found this tutorial incredibly helpful.
Since it couldn't be helped, I sewed the rest of the binding by hand. And surprisingly enough it took me only two long evenings. And was kind of satisfying... really.
And the icing on the cake is the "25" I stitched into one corner of the quilt, which took me another two evenings. Without an embroidery frame. Again, something I won't do again.
Although the fabric is a little crumply around the edges, I still think the 25 turned out beautifully, I really like it.
Actually, I like the whole damn thing because its cozy and incredibly warm and it doesn't fall apart :'D
I sure will do more quilting projects now that I know which mistakes to avoid, but not until I bought a rotary cutter and a cutting mat. Seriously.
Follow me
This project was planned some time in advance and I worked on it over a long period of time with long breaks in between. So no picture tutorial, sorry. But the text will reveal some of the problems I had in the process and might be helpful for starters who don't want to make the same mistakes as I did.
Of course I first made a lot of sketches with elaborate quilting patterns until I realised that I should probably start with something simple. But even those rectangles didn't quite turn out as I had planned them.
Then I went to buy fabric. And believe me, quilting fabric and wadding for a 2x2m quilt is not quite cheap x_X But it was a special present, so I wanted to use good fabrics.
I think I screwed up the colour mix and pattern a bit, especially with that ochre-coloured fabric. Oh well...
Then I started to cut the rectangles.
Please, if you ever cut fabric for quilting.... use a template to draw the pattern onto the fabric, use a rotary cutter for cutting. I HAD a pattern, but missed out on the seam allowance, so I added that by guessing. Of course, it became irregular. And I didn't have a rotary cutter. Two mistakes I WILL NEVER MAKE AGAIN.
It could have saved me so much pain to just cut a new template, but I was too eager to start.
Damn you, enthusiasm!
Here's the crumply quilt in all its mighty glory. After I had cut out all the rectangles, I sewed them together. The borderlines don't fit exactly because of my guessing work on the seam allowance. Meh.
Afterwards I ordered a very large and very warm and plushie microfibre blanket from ebay for the backing of the quilt. I adjusted all three layers - the backing, the wadding, and on top the.. well, top of the quilt, the patterned fabric. I secured them with saftey pins and started to sew all of it together.
First all horizontal lines, then all vertical lines. Of course always along the lines on the fabric, which didn't always work, but most of the times.
At the end it became quite difficult to fit everything under my sewing machine. And I'm glad about that walking foot I bought two years ago.
After I had sewn all the lines, only the borders were still open. That's when I discoevered I had to sew 50% of the binding by hand x_x That's about 8 meters!!!
Anyway, I found this tutorial incredibly helpful.
Since it couldn't be helped, I sewed the rest of the binding by hand. And surprisingly enough it took me only two long evenings. And was kind of satisfying... really.
And the icing on the cake is the "25" I stitched into one corner of the quilt, which took me another two evenings. Without an embroidery frame. Again, something I won't do again.
Although the fabric is a little crumply around the edges, I still think the 25 turned out beautifully, I really like it.
Actually, I like the whole damn thing because its cozy and incredibly warm and it doesn't fall apart :'D
I sure will do more quilting projects now that I know which mistakes to avoid, but not until I bought a rotary cutter and a cutting mat. Seriously.
Follow me
Labels:
quilting
More Papercraft: Gift Boxes and Pencil Box
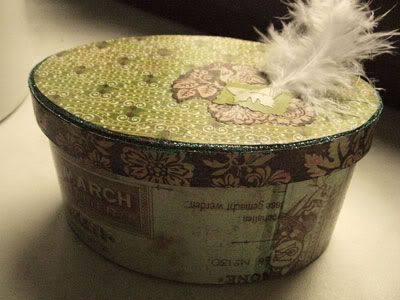
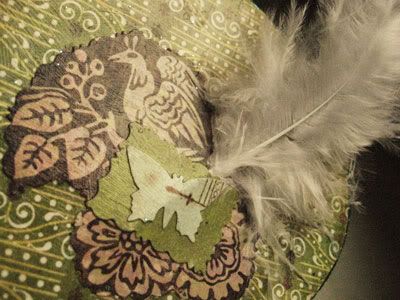
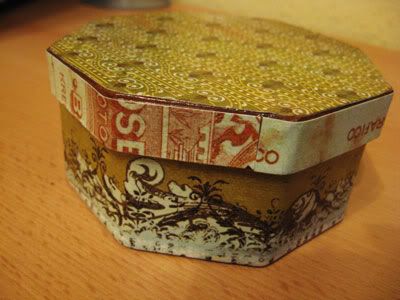
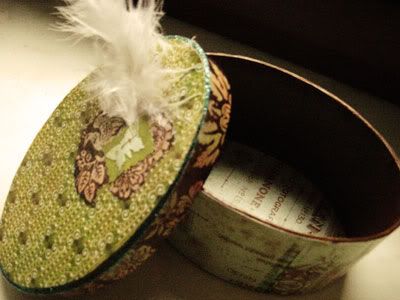
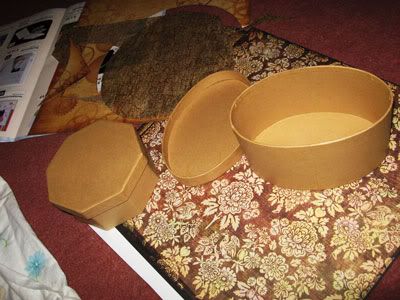
I recently made two gift boxes for friends' birthdays. Actually, you can never have too many boxes, can you?
It's easy as pie and I used the same technique as with the cardboard drawer.
#1
#2
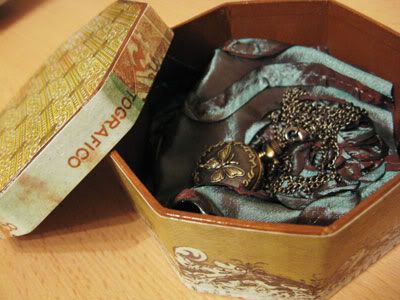
Duh... the lid has eight sides I made take a picture of the one where the ends of the paper strip meet... Yeah, that's me.
Inside this one is some leftover and very nice petrol fabric and a kind of pocket watch on a necklace.
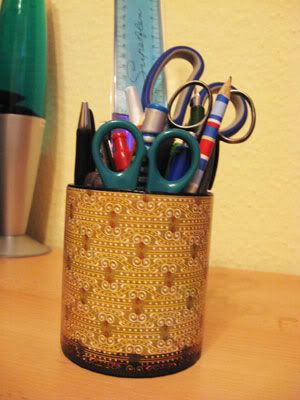
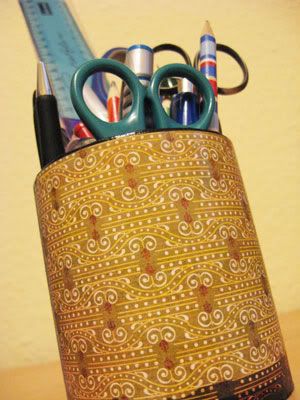
The second project was the pencil box. I had this one for ages, really. It was still fine, just needed a new look.
That's it. More papercraft sure to come! Follow me