"All art is quite useless" - Oscar Wilde
RSS
Showing posts with label accessories. Show all posts

April 04, 2011

Book purse

As some of you may know, I make my income supporting my studies by making purses out of books.
Well, as I don't want to adorn myself with borrowed plumes, I have to admit that this beautiful accesoire is very common in the United States.
If you want to sew such a purse too, just look behind the curtain.


I think it's pretty easy to sew such a purse.
At first, you look for a very beautiful old book and some fabric (about 40 x 110 cm) thats fits to the cover of the book. Cut out the pages with a safety knife and keep it for further information ;-) Also you need about 1,50 of cord and other things you see in the picture:


Now we need a pattern. Use baking paper. I normally take the normal size of the book when its opened, add 1 cm seam allowance and then we put wings in the middle of the book, wide as the spine of the book an the sides have to be as long as the half of the long side of the book minus the half of the spine. Then draw a line at each side with around 65 degrees, you may need a set square to be exact. Also add a litte seam allowance here around the wings.


Then cut out the pattern, put it on the doubled fabric an eventually use "flieseline" on top to make it a bit stiffer.

Cut out the pattern with the fabric and don't forget to have four squares to attach the handles.

Iron the fabric with the Flieseline, sew the sides of the squares together and turn it around to the right side, also iron it.
Now we need the glue. Put a small amount of glue in the corners of the book and blur it with a Q-tip, put the strips on and give some glue onto them, to attach the cord on them as handles, close the strips an glue them on the book. (pew, that was hard to describe)
Then make it fix with clamps.

Now we sew the inlay. Put the fabric together so that the wrong sides look at each other and sew around the borders, leave a little hole.

Now make a little crop with a scissor in every corner which goes inside, that there are no wrinkles later on.

Now we turn the inlay to the right side by pulling one wing through the hole on the other side and also the rest. Now we iron again to have the inlay flat.

Attach the wings on the sides by sewing with a criss-cross-stitch and you get an inlay that looks like a hat XD.


It's nearly done. Just glue the inlay into the book.

Also fix with clamps and let it dry.

To close the purse, you can use satin bands and make a ribbon, or buttons on the one side and an elastic on the other. I normally make a "tongue" where i put a magnet inside and another magnet on the front of the book inside.

There are a lot of variations to make it pretty.

Thats the result:


More on my homepage.
Follow me

December 23, 2010

It's just a piece of cake!

Hello fellows, here comes a very sweeeeet possibility to create a present for your loved ones (if they like sweet things, of course).

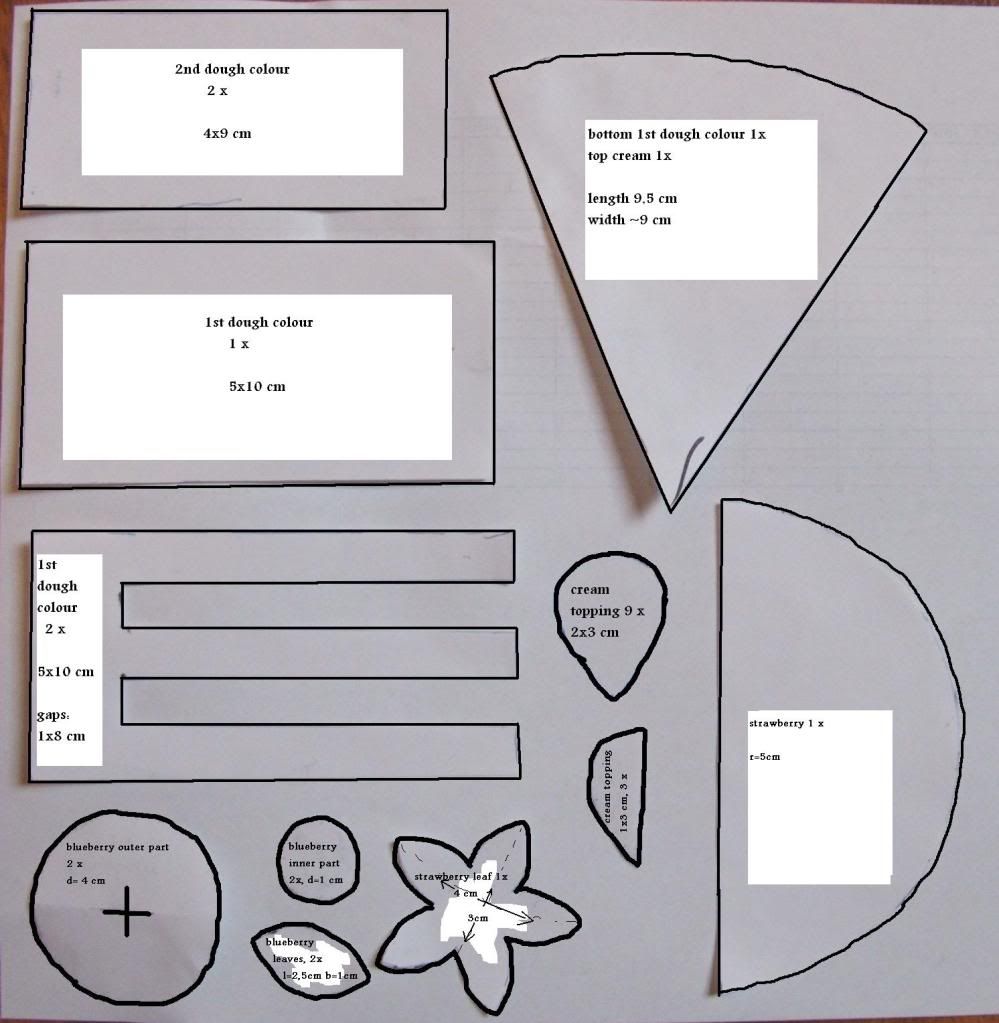
I took a photo of the pattern I used and tried to mark it for better understanding. Sitting at my parents home I can't use another program to draw on the computer, which would not be any better, anyways. >D
(click to enlarge)
I acutally used a pattern, decembersong got from some friends a little while ago. It was a Japanese handicraft box including the pattern plus felt.

So this is what you need:
the pattern
different colours of felt
some wad/cotton wool for making plushies, e. g.
scissors
needle/s and threads in matching colours
maybe some glue

I used
middle brown as 1st dough colour
light violet as 2nd dough colour
white for the cream topping
dark violet and light violet for the blueberry
red for the strawberry
light and dark green for the leaves

First, cut out all the patterns. Then start sewing the side parts of the cake. Sew the part of the 1st dough colour with the gaps and the littler 2nd dough part together using a thread coloured like the 1st dough. Sew the side parts on the side where the gaps are, together. You may add some little dots in a different (darker) thread-colour onto the the 2nd dough colour to make it look like there were pieces of fruit in it.
When finished attach the side parts to the bottom part, then add the back part (it's the biggest square on the pattern labelled 1st dough colour, 1x).
Start sewing the top part onto the cake, but leave a little part of it open to fill in the wad, until it's a puffy piece of cake, then close the gap.

Now you can start making the decoration:
Use some yellow thread to apply little dots on the red strawberry felt, then loosely sew a thread through the round part of it. Leave some thread at the end and don't make a knot. Then bend the felt, so it looks like a little cone and sew the straight parts together. After that stuff some wad into the cone and pull on the thread you left at the round part of the strawberry, it will kind of riffle right now and close around the wad. Pull tightly and then sew through the bottom part of the strawberry to ensure that it won't open again.Now attach the strawberry leaf with green thread.

For making the blueberries, cut the cross in the middle of the bigger circle, then sew or glue the little circle onto it. Now sew a loose thread round the edges of the bigger circles each and leave some at the end, not making a knot again. Fill in some wad and pull the thread like you did with the strawberry.
For the little leaves use some lighter or darker thread to sew a line on them, so it looks like a leaf vein, then attach them to the blueberries.

Now you have to sew the cream topping. Sew 3 of the drop-shaped white felt parts together by sewing a line from one end to the other. Then add one of the 3 "half-drops" at the top. I guess you will have to twitch a little until it looks nice.

When finished, add the decoration to the top of the piece of cake.
First, sew the cream topping onto the back edge of the white cream top part. Then place the strawberry and the blueberries in the middle.

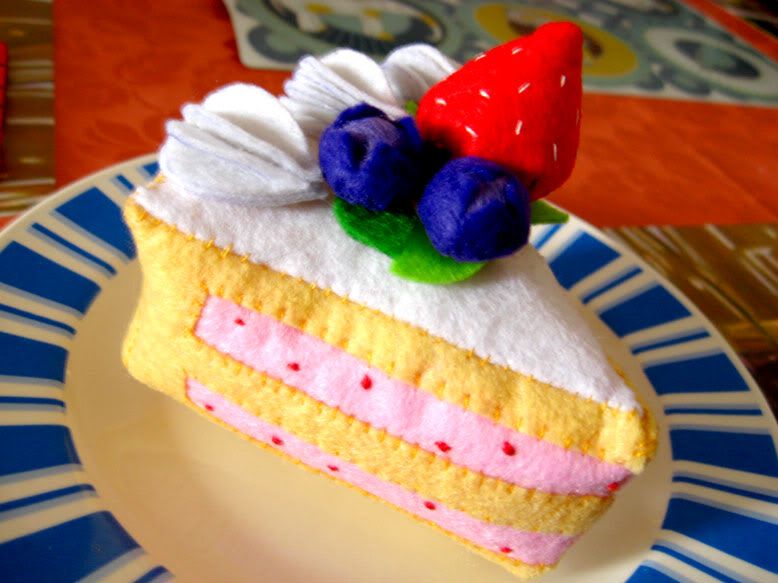
Tadaaa~ finished.
You can either give this away as a present or decorate your home with it. :)

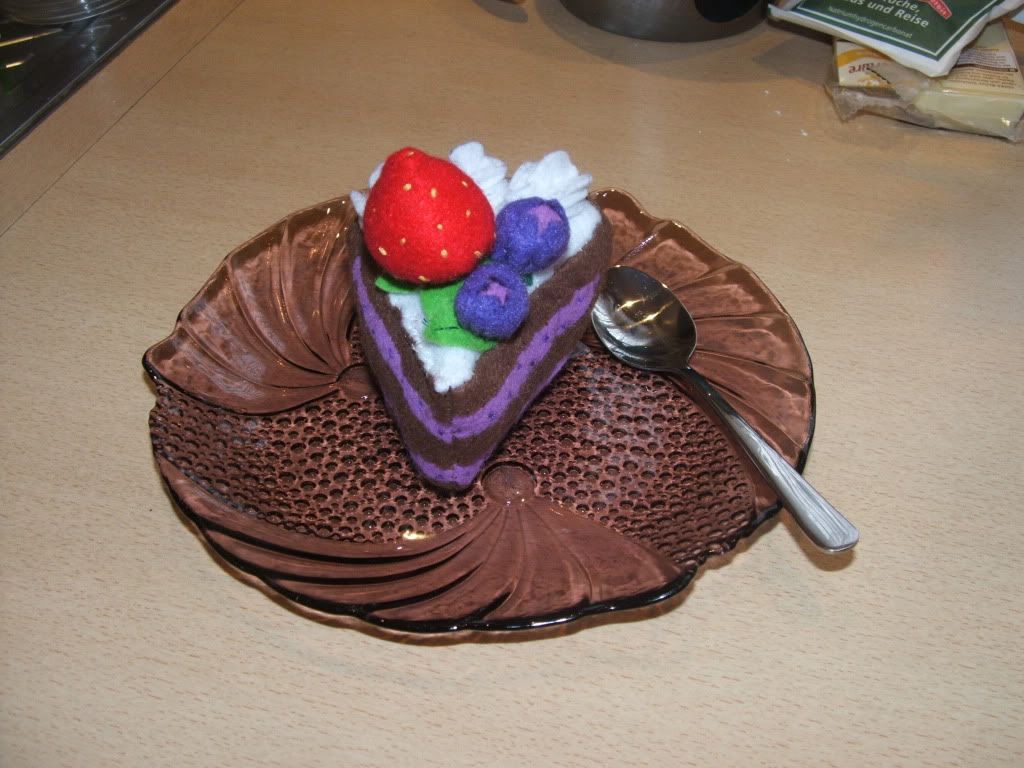
Here you can see the cake, decembersong sewed:


Follow me

July 20, 2010

Painting the Pansies Purple

Hello everybody,

Welcome to my first craft post on this blog. I hope you enjoy the instructions! In case of confusion, I will be happy to help you and answer all kinds of questions.

Whenever I get a new dress, be it bought or selfmade, I am seized by the terrible urge to make matchy stuff to go with it. Since my latest dress has pansies and I have no cream coloured hair accessoiries, I decided to sew a floral fascinator.


There it is in its colourful goodness. The base is an oval of buckram and wire. It is backed with felt (because buckram is ugly) and attaches to the hair with a little metal comb. The flowers are made from different types of cheapo satin ribbon, which I painted to my heart's delight.

In order to recreate the floral arrangement, I recommend reading Helen Gibb's Ribbonwork - The Complete Guide*. In there, she introduces the so called U-gather. It's a technique to gather ribbon (obviously). You take your length of ribbon and sew gathering stitches to create a u-shape, as the name suggests. This is then pulled together to form single petals and leaves. Make multiple U-gathers on one strand of ribbon to form the pink flowers (they turn out best with 6 Us). Generally, it helps to look at pictures of your choice of flowers to find out how the petals have to be arranged. The huge pansy was make from 5 singly u-gathered pieces of ribbon. Everything was sewn on by hand and then painted with thinned acrylics. Paint one colour at a time and always wait until it's dry to avoid wet ribbon soaking in other colours. Hide the edges with lace and add pearls for decoration. Voilá - crazy headdress.

*I would love to give you more detailed instructions and pictures on Mrs Gibbs' method, but I'm afraid she'll sue me for posting them here. Hope you understand. If you need further help, just ask.

Follow me